Cosmos GUI
Content:
Introduction
There is a GUI governing both the storage and the computing cluster (in future releases, it will be fully integrated with Sahara's dashboard as well). Through this GUI the users will be able to create an account, i.e. a HDFS userspace for storing data, and access to the computing resources for running MapReduce applications.
Fully detailed information about Cosmos GUI can be found at Github.
Installation
This is a software written in JavaScript, specifically suited for Node.js (JavaScript on the server side). JavaScript is an interpreted programming language thus it is not necessary to compile it nor build any package; having the source code downloaded somewhere in your machine is enough.
Prerequisites
This GUI has no sense if there is no storage and computing clusters to be managed.
A couple of sudoer users, one within the storage cluster and another one within the computing clusters, are required. Through these users the cosmos-gui will remotely run certain administration commands such as new users creation, HDFS userspaces provision, etc. The access through these sudoer users will be authenticated by means of private keys. Please, see the Annex A in order to know how to create a sudoer user, and how to install its RSA identity for ssh operation.
The Cosmos users management is done by means of a MySQL database, thus install it in the same node the GUI runs, or a remote but accessible machine.
As said, cosmos-gui is a Node.js application, therefore install it from the official download. An advanced alternative is to install Node Version Manager (nvm) by creationix/Tim Caswell, whcih will allow you to have several versions of Node.js and switch among them.
Of course, common Unix tools such as git and curl are needed.
Installating the GUI
cosmos-gui must be installed in a machine having ssh access both to the storage and computing clusters the GUI is going to manage. This ssh access may be limited to the Namenode (or Namenodes, if HA is enabled) of each cluster, and it is necessary since certain administration commands are remotely run through ssh.
Start by creating, if not yet created, a Unix user named cosmos-gui; it is needed for installing and running the application. You can only do this as root, or as another sudoer user:
$ sudo useradd cosmos-gui
$ sudo passwd cosmos-gui <choose_a_password>
While you are a sudoer user, create a folder for saving the cosmos-gui log traces under a path of your choice, typically /var/log/cosmos/cosmos-gui, and set cosmos-gui as the owner:
$ sudo mkdir -p /var/log/cosmos/cosmos-gui
$ sudo chown cosmos-gui:cosmos-gui /var/log/cosmos/cosmos-gui
Now, change to the new fresh cosmos-gui user:
$ su - cosmos-gui
Before continuing, remember to add the RSA key fingerprints of the Namenodes accessed by the GUI. This fingerprints are automatically added to /home/cosmos-gui/.ssh/known_hosts if you try a ssh access to the Namenodes for the first time.
$ ssh somesudoeruser@my.storage.namenode.com
The authenticity of host 'my.storage.namenode.com (192.168.12.1)' can't be established.
RSA key fingerprint is 96:c4:0b:8c:09:ce:d4:09:91:a2:b2:9c:40:71:9b:c6.
Are you sure you want to continue connecting (yes/no)? yes
Warning: Permanently added 'my.storage.namenode.com,192.168.12.1' (RSA) to the list of known hosts.
Please observe somesudoeruser is the (ficticious) sudoer user required for the storage cluster, as stated in the Prerequisites section. Do the same for the computing cluster.
Then, clone the Cosmos repository somewhere of your ownership:
$ git clone https://github.com/telefonicaid/fiware-cosmos.git
cosmos-gui code is located at fiware-cosmos/cosmos-gui. Change to that directory and execute the installation command:
$ cd fiware-cosmos/cosmos-gui
$ git checkout release/x.y.z
$ npm install
That must download all the dependencies under a node_modules directory.
Installing the database
The user management for the storage cluster is done through a MySQL database, cosmos. The commands for creating this database and the cosmos_user table can be found at resources/mysql_db_and_tables.sql. Please observe if you already installed a database for a previous version of the GUI, please ignore this section and visit the specific upgrading section.
Simply log into your MySQL deployment and execute the sentence within the file above:
mysql> resources/mysql_db_and_tables.sql
Alternatively, you can copy&paste the SQL sentences and execute them:
$ mysql -u <user> -p
Enter password:
Welcome to the MySQL monitor.  Commands end with ; or \g.
Your MySQL connection id is 1640
Server version: 5.1.73 Source distribution

Copyright (c) 2000, 2013, Oracle and/or its affiliates. All rights
reserved.

Oracle is a registered trademark of Oracle Corporation and/or its
affiliates. Other names may be trademarks of their respective
owners.

Type 'help;' or '\h' for help. Type '\c' to clear the current input statement.

mysql> CREATE DATABASE IF NOT EXISTS cosmos;
mysql> USE cosmos;
mysql> CREATE TABLE cosmos_user (
    -> id VARCHAR(128) NOT NULL PRIMARY KEY UNIQUE,
    -> email TEXT NOT NULL,
    -> hdfs_quota BIGINT NOT NULL,
    -> hdfs_used BIGINT NOT NULL,
    -> fs_used BIGINT NOT NULL,
    -> registration_time TIMESTAMP DEFAULT "0000-00-00 00:00:00",
    -> last_access_time TIMESTAMP DEFAULT "0000-00-00 00:00:00",
    -> num_ssh_conn_ok BIGINT NOT NULL,
    -> num_ssh_conn_fail BIGINT NOT NULL);
Upgrading from 0.1.0 to 0.2.0
NOTE: It is highly recommended you backup your cosmos database before performing any upgrade operation.
You are visiting this section since you already installed Cosmos GUI 0.1.0 and want to upgrade to 0.2.0. If you never installed the GUI before, please go to the Installing the database section.
Cosmos GUI 0.2.0 adds some columns to the cosmos_user table, and many others are modified. In order to do the upgrade, please execute the resources/mysql_upgrade_0.1.0-0.2.0.sql file:
mysql> SOURCE resources/mysql_upgrade_0.1.0-0.2.0.sql
Or type the sentences within that file into a mysql shell:
mysql> USE cosmos;
mysql> ALTER TABLE cosmos_user MODIFY registration_time TIMESTAMP DEFAULT "0000-00-00 00:00:00";
mysql> ALTER TABLE cosmos_user ADD COLUMN last_access_time TIMESTAMP DEFAULT "0000-00-00 00:00:00";
mysql> ALTER TABLE cosmos_user ADD COLUMN hdfs_used BIGINT NOT NULL;
mysql> ALTER TABLE cosmos_user ADD COLUMN fs_used BIGINT NOT NULL;
mysql> ALTER TABLE cosmos_user ADD COLUMN num_ssh_conn_ok BIGINT NOT NULL;
mysql> ALTER TABLE cosmos_user ADD COLUMN num_ssh_conn_fail BIGINT NOT NULL;
mysql> ALTER TABLE cosmos_user MODIFY hdfs_quota BIGINT NOT NULL;
mysql> UPDATE cosmos_user SET hdfs_quota=1073741824*hdfs_quota;
Upgrading from 0.2.0 to 0.3.0
NOTE: It is highly recommended you backup your cosmos database before performing any upgrade operation.
You are visiting this section since you already installed Cosmos GUI 0.2.0 and want to upgrade to 0.3.0. If you never installed the GUI before, please go to the Installing the database section.
Please observe moving from 0.2.0 to 0.3.0 implies a hard change of behaviour regarding the Cosmos user provision and the Cosmos usage itself:
- On the one hand, Cosmos passwords are not necessary anymore, thus,
sshaccesses to the clusters are not allowed anymore. - On the other hand, the Cosmos users are not based on the Identity Manager (IdM) registered email, but the ID of the user at the IdM.
Both changes have direct implications on the database, where the idm_username and username are replaced by email and id, respectively. In order to do the upgrade, please execute the resources/mysql_upgrade_0.2.0-0.3.0.sql file:
mysql> SOURCE resources/mysql_upgrade_0.2.0-0.3.0.sql
Or type the sentences within that file into a mysql shell:
mysql> USE cosmos;
mysql> ALTER TABLE cosmos_user RENAME idm_username TO email;
mysql> ALTER TABLE cosmos_user RENAME username TO id;
Registering the application in the Identity Manager
Authentication in cosmos-gui is done through a FIWARE's Identity Manager (for instance, FIWARE LAB one is https://account.lab.fiware.org). By using this kind of authentication the cosmos-gui is integrated in a fully common experience together with many other enablers of the FIWARE ecosystem, instead of performing a propietary user management.
Please observe the user management for accessing the GUI or any other FIWARE component is not related to the Hadoop user management performed, particularly, by this GUI.
Registration must be done one and only once. As an already registered user in the Identity Manager, login (this user will be the admin user). You should be able to see an applications panel, in addition to an organizations panel, in your home tab:

Click in the register button of the applications panel and give a name, a description, a URL and a callback URL for the new application. For instance:
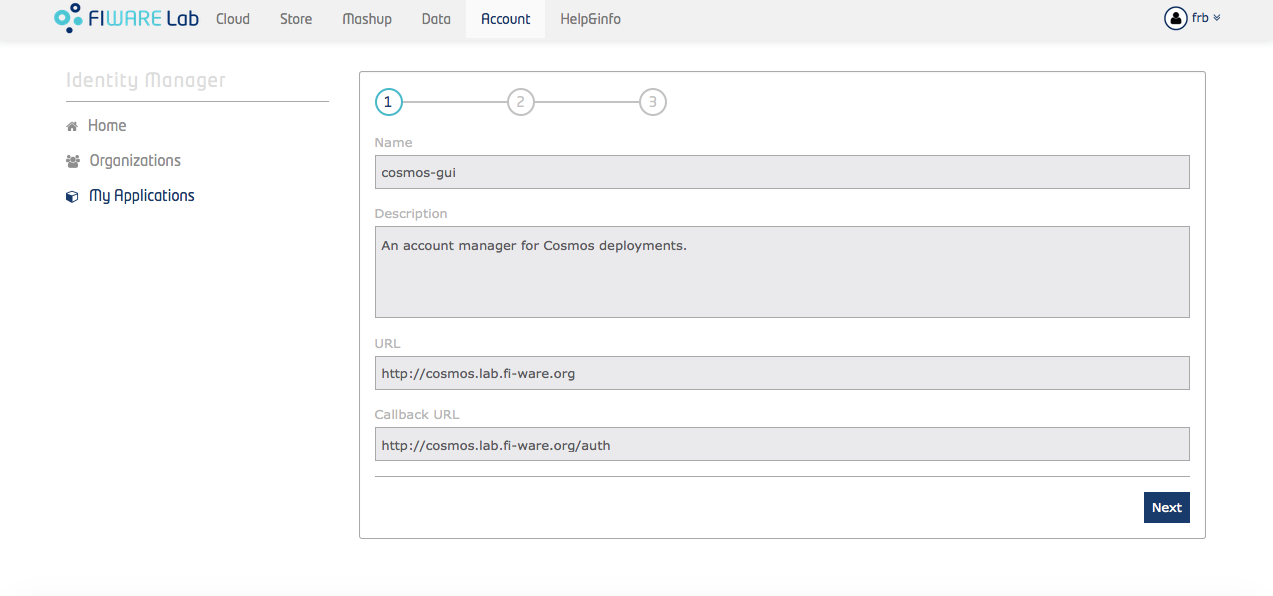
Then choose an image for the application, this will be shown as an icon for future users:
![]()
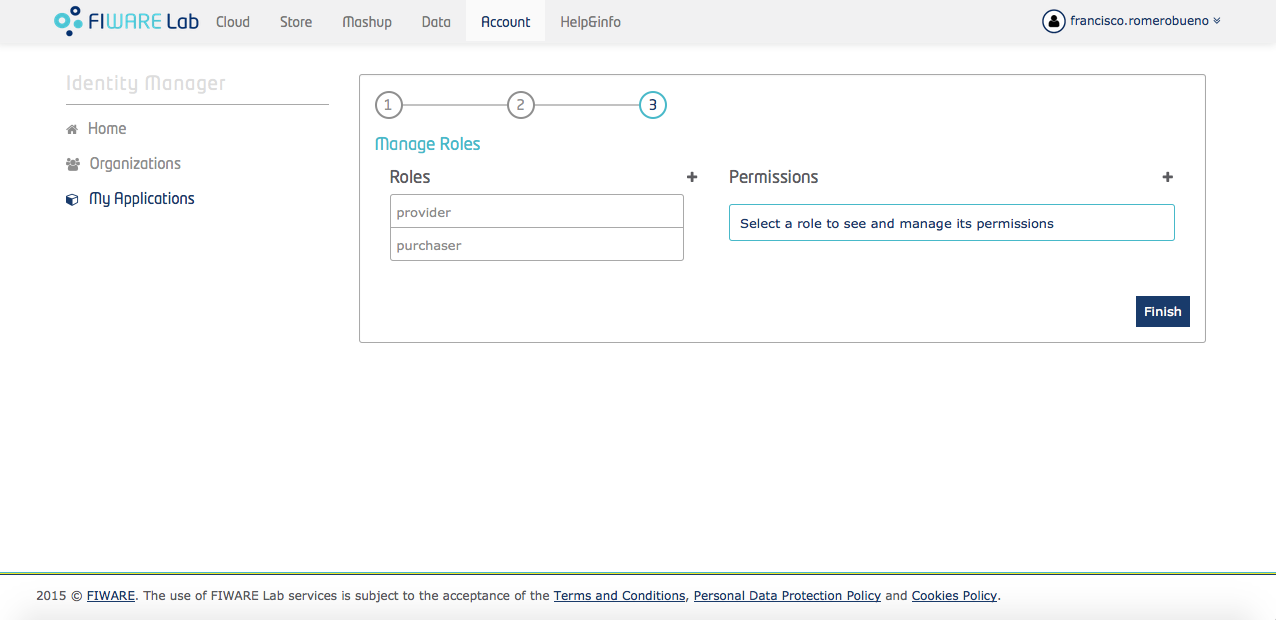
Finally, manage the roles for this application. If you do not expect to add more roles than the default ones, or you simply do not know about roles, skip this step and finish the user registration:
cosmos-gui is now registered:
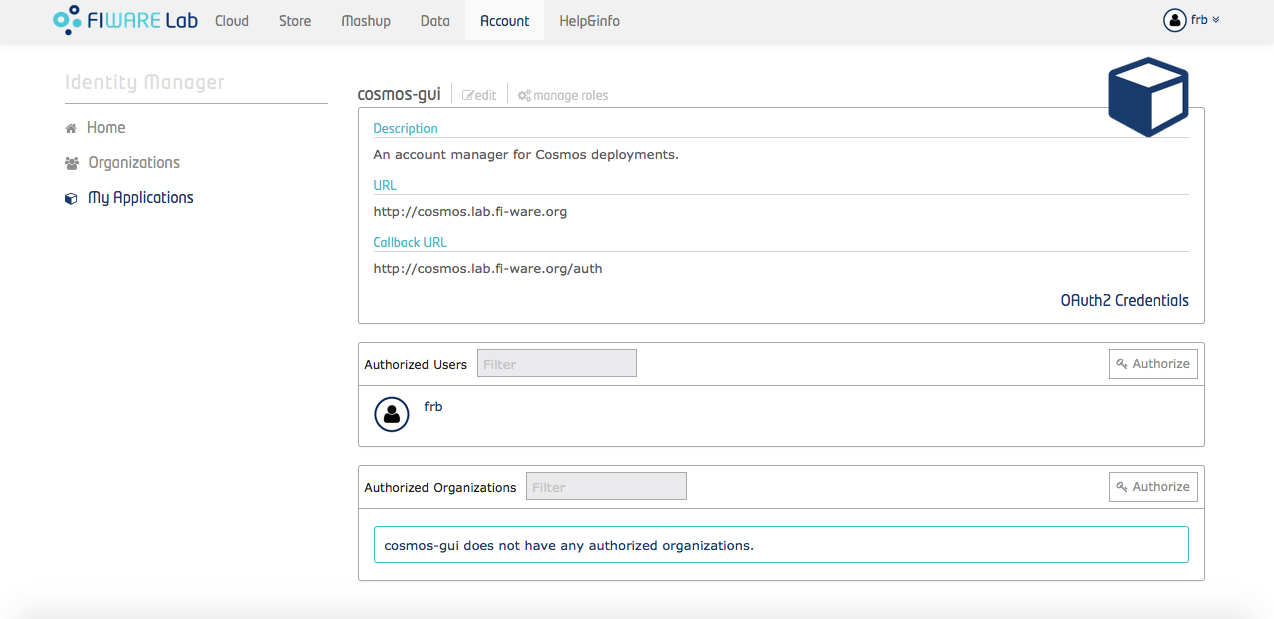
An important result of the registration process are the OAuth2 credentials that can be inspected by clicking on the appropriate button. These credentials must be configured in cosmos-gui as shown later.
Unit tests
The tests are running by invoking the make command:
$ make
***** STARTING TESTS *****

  ․ [mysqlDriver.addUser] add a new user should return null error and an empty result set: 5ms
  ․ [mysqlDriver.getUser] get a user by his/her id should return null error and a result set containing frb: 1ms

  2 passing (15ms)

****** TESTS ENDED *******
Configuration
cosmos-gui is configured through conf/cosmos-gui.json. There you will find a JSON document with six main sections:
- gui:
- port: Specifies the listening port for the application. By default it is 80, but can be changed if such a port is being used in your deployment.
- private_key_file: File name containing the private key used to encrypt the communications with the clients.
- certificate_file: File name containing the self-signed X509 certificate used by the server to send the clients the public counterpart of the above private key (see Annex B].
- clusters:
- storage
- endpoint: IP address or FQDN of the Namenode/HttpFS server of the storage cluster.
- user: Unix user within the Namenode/HttpFS server having sudo permissions.
- private_key: user's private key used to ssh into the Namenode/HttpFS server.
- computing
- endpoint: IP address or FQDN of the Namenode/HttpFS server of the computing cluster.
- user: Unix user within the Namenode/HttpFS server having sudo permissions.
- private_key: User's private key used to ssh into the Namenode/HttpFS server.
- storage
- hdfs:
- quota: Measured in bytes, defines the size of the HDFS space assigned to each Cosmos user.
- superuser: HDFS superuser, typically
hdfs.
- oauth2:
- idmURL: URL where the FIWARE Identity Manager runs. If using the global instance at FIWARE LAB, it is
https://account.lab.fiware.org. - client_id: This is given by the Identity Manager once the cosmos-gui has been registered.
- client_secret: This is given by the Identity Manager once the cosmos-gui has been registered.
- callbackURL: URL used by the Identity Manager to return the control to the GUI once the delegated authentication step has finished. This must be
http://localhost:<listening_port>/auth. - response_type: Must be
code.
- idmURL: URL where the FIWARE Identity Manager runs. If using the global instance at FIWARE LAB, it is
- mysql:
- host: IP or FQDN of the host running the MySQL server.
- port: Port the MySQL server is listening for new incoming connections. Typically 3306.
- user: A valid user in the MySQL server with permissions to insert into the
cosmos_usertable. - password: Password for the above user in MySQL.
- database: Must be
cosmos.
- users_blacklist: An array of strings not allowed to be a username.
- log:
- file_name: Path of the file where the log traces will be saved in a daily rotation basis. This file must be within the logging folder owned by the the user
cosmos-gui. - date_pattern: Data pattern to be appended to the log file name when the log file is rotated.
- level: Minimum logging level to be considered. Possible values (including hierarchy) are:
OFF>ERROR>WARN>INFO>DEBUG>ALL.
- file_name: Path of the file where the log traces will be saved in a daily rotation basis. This file must be within the logging folder owned by the the user
Running
The GUI implemented by cosmos-gui is run as (assuming your current directory is fiware-cosmos/cosmos-gui):
$ npm start
This command invokes the start script within package.josn:
"scripts": {
    "start": "sudo node ./src/cosmos_gui.js"
}
Please observe the usage of sudo. This is because the GUI must be able to execute certain privileged Unix and Hadoop commands when setting up Cosmos accounts. Never run cosmos-gui (nor any other service) as the root user.
If everything goes well, you should be able to see in a web browser the login page (http://<node_hosting_cosmos_gui>:<port>):
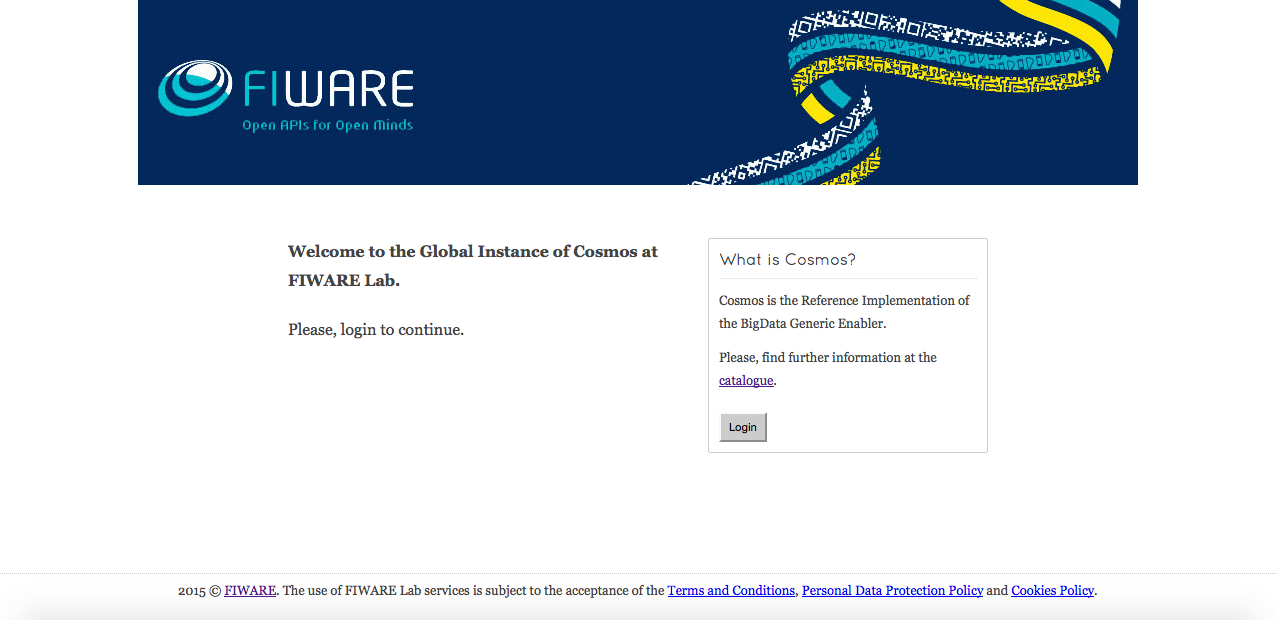
cosmos-gui typically listens in the TCP/443 port (TLS encryption), but you can change it by editing conf/cosmos-gui.conf.
Administration
Two are the sources of data, the logs and the database, useful for an administrator of cosmos-gui.
Logging traces
Logging traces, typically saved under /var/log/cosmos/cosmos-gui, are the main source of information regarding the GUI performance. These traces are written in JSON format, having the following fields: level, message and timestamp. For instance:
{"level":"info","message":"cosmos-gui running at http://localhost:9090","timestamp":"2015-07-23T13:25:20.019Z"}
Logging levels follow this hierarchy:
debug < info < warn < error < fatal
Within the log it is expected to find many info messages, and a few of warn or error types. Of special interest are the errors:
- There was some error when connecting to MySQL database. The server will not be run: This message may appear when starting the GUI. Most probably the MySQL endpoint is not correct, the MySQL user is not allowed to remotely connect, of there is some network error like a port filtering.
- There was some error when getting user information from the database: This message may appear when a user gets the main page and his/her session has not yet expired; then, his/her information is retrieved from the database. Most probably some network error is avoiding to get that information, since the initial connection to the database was successful.
- There was some error when getting user information from the IdM: This message may appear when a user signs in using his/her Identity Manager (IdM) credentials. Most probably the IdM endpoint is not correct, the client id and secret related to cosmos-gui are not correct or the callback URL has not been properly set.
- There was some error when adding information in the database for user \
: This message may appear when a new fresh user has accessed the GUI for the first time. Most probably some network error is avoiding to get that information, since the initial connection to the database was successful. - There was an error while adding the Unix user \<unix_user>: This message may appear once the user has successfully signed in and the GUI starts provisioning his/her Cosmos account. Most probably, the user configured for the storage or computing cluster is not a sudoer, or there is some network error with the ssh access.
- There was an error while creating the HDFS folder for user \<cosmos_user>: This message may appear once the user has successfully signed in and the GUI starts provisioning his/her Cosmos account. Most probably, the user configured for the storage or computing cluster is not a sudoer, or there is some network error with the ssh access.
- There was an error while changing the ownership of /user/\<cosmos_user>: This message may appear once the user has successfully signed in and the GUI starts provisioning his/her Cosmos account. Most probably, the superuser configured for HDFS is not a superuser, or there is some network error with the ssh access.
- There was an error while changing the permissions to /user/\<cosmos_user>: This message may appear once the user has successfully signed in and the GUI starts provisioning his/her Cosmos account. Most probably, the superuser configured for HDFS is not a superuser, or there is some network error with the ssh access.
- There was an error while setting the quota to /user/\<cosmos_user>:: This message may appear once the user has successfully signed in and the GUI starts provisioning his/her Cosmos account. Most probably, the superuser configured for HDFS is not a superuser, or there is some network error with the ssh access.
Database
Information regarding registered users in Cosmos can be found in a MySQL table named cosmos_user within a database named cosmos_gui in the MySQL deployment you did when installing the GUI. Such a table contains the IdM username, the Cosmos username, the password and the registration time.
$ mysql -u cb -p
Enter password:
Welcome to the MySQL monitor.  Commands end with ; or \g.
...
Type 'help;' or '\h' for help. Type '\c' to clear the current input statement.

mysql> show databases;
+-----------------------+
| Database              |
+-----------------------+
| information_schema    |
| cosmos                |
| mysql                 |
| test                  |
+-----------------------+
4 rows in set (0.00 sec)

mysql> use cosmos;
Reading table information for completion of table and column names
You can turn off this feature to get a quicker startup with -A

Database changed
mysql> show tables;
+------------------+
| Tables_in_cosmos |
+------------------+
| cosmos_user      |
| tidoop_job       |
+------------------+
2 rows in set (0.00 sec)

mysql> select * from cosmos_user;
+----------------------------------+--------------------------------------+------------+-----------+---------+---------------------+---------------------+-----------------+-------------------+
| id                               | email                                | hdfs_quota | hdfs_used | fs_used | registration_time   | last_access_time    | num_ssh_conn_ok | num_ssh_conn_fail |
+----------------------------------+--------------------------------------+------------+-----------+---------+---------------------+---------------------+-----------------+-------------------+
| e170190b41724b298862fdc89d32f8e7 | francisco.romerobueno@telefonica.com | 5368709120 |         0 |       0 | 0000-00-00 00:00:00 | 0000-00-00 00:00:00 |               0 |                 0 |
+----------------------------------+--------------------------------------+------------+-----------+---------+---------------------+---------------------+-----------------+-------------------+

368 rows in set (0.00 sec)
Annexes
Annex A: Creating and installing a RSA identity
For this guide we will assume there is a server machine server_vm needed to be accessed by a client machine client_vm.
First of all, log into the server machine as any other sudoer user and create the cosmos-sudo user:
$ sudo useradd cosmos-sudo
Do not add a password to the cosmos-sudo user since only the ssh keypair will be used for authentication.
Add this user to the sudoers group:
$ visudo
Add the following line to the appropriate section:
cosmos ALL=(ALL) ALL
Now, log as cosmos-sudo and create the ssh keypair; when prompted for the passphrase, leave it empty; use the default id_rsa name for the private key (id_rsa.pub will be the public counterpart):
$ su - cosmos-sudo
$ ssh-keygen
Despite the empty passphrase, it is necessary to remove it (it exists, but it is empty):
$ openssl rsa -in ./ssh/id_rsa -out ./ssh/id_rsa2
Then, change the permissions of the private key, the default ones are too open:
$ chmod 600 ./ssh/id_rsa2
The private key must be copied somewhere the GUI running in the client machine may found it within the cosmos-gui user account, let's say fiware-cosmos/cosmos-gui/conf/:
$ scp ./ssh/id_rsa2 cosmos-gui@client_vm:/home/cosmos-gui/fiware-cosmos/cosmos-gui/conf/
Copy the public key to the authorized_keys file as well; this file is read by ssh when authenticating as the cosmos-sudo user:
$ cat /home/cosmos-sudo/.ssh/id_rsa.pub >> /home/cosmos-sudo/.ssh/authorized_keys
Finally, you can check the access from the client machine:
$ su - cosmos-gui
$ ssh -i conf/id_rsa2 cosmos@server_vm
Annex B: Creating a self-signed certificate
First of all, create a private key; it may not be necessary if you already have one:
$ openssl genrsa -out private-key.pem 1024
Second, create a Certificate Signing Request (CSR) using the private key:
$ openssl req -new -key private-key.pem -out csr.pem
Finally, create the self-signed certificate:
$ openssl x509 -req -in csr.pem -signkey private-key.pem -out public-cert.pem -days 1000
Please observe a duration of 1000 days for the certificate has been specified.
Annex C: Binding the GUI to a port under TCP/1024
This GUI may run in any port the user configures. Nevertheless, most of the Unix-like systems avoid non sudoer users to bind applications to ports under 1024. Since the cosmos-gui user is not a sudoer one, you won't be able to run the GUI in the typical TCP/443 port, for instance.
In order to solve this, there are several possibilities. One of them is setting the cap_net_bind_service capability:
$ setcap cap_net_bind_service=+ep /path/to/cosmos-gui
Nevertheless, the above shows some problems, for instance, it is only valid for kernels over 2.6.24, and Linux will disable LD_LIBRARY_PATH on any program that has elevated privileges like setcap or suid.
Another one option (the preferred one) is to use port forwarding. By using this technique, the GUI is run on a port over 1024 (e.g. 9090) and an iptables rule is configured this way:
$ iptables -A PREROUTING -t nat -p tcp --dport 443 -j REDIRECT --to-port 9090
Which means all the traffic sent to the TCP/443 port will be forwarded to real binding port, TCP/9090.